Introduction to Roblox Studio
What is Roblox Studio?
Roblox Studio a is a software program that allows you to create your own video games and virtual worlds. It is like a toolbox for game developers, where you can use different tools and features to design and build your own games from scratch.
Using Roblox Studio, you can create 3D environments, design characters, and add interactive elements to your game, such as obstacles, enemies, and collectibles. You can also add scripts and programming code to make your game more advanced and interesting.
Think of Roblox Studio as a blank canvas that you can use to create your own unique games and experiences. Whether you want to create a racing game, a puzzle game, or an adventure game, Roblox Studio provides you with the tools and resources to bring your ideas to life.
Once youv have created your game, you can publish it on the Roblox platform so that other players can play and enjoy it. You can also collaborate with other game developers to create even more complex and exciting games.
Overall, Roblox Studio is a great way to explore your creativity, learn about game development, and have fun designing and playing your own games.
Creating a Place In Roblox Studio
In Roblox Studio, a place is a virtual environment that you create for your game. It is like a stage where your game will take place. A place is made up of different parts, objects, and characters that you create and customize to make your game unique.
Think of a place as a canvas that you can paint on to create your own world. You can add different types of objects, such as buildings, trees, and vehicles, to make your world more interesting and fun to explore. You can also add characters and NPCs (non-player characters) to interact with, and create different challenges or objectives for players to complete.
Once you have created a place in Roblox Studio, you can test it out to see how it looks and plays. You can also publish it to the Roblox platform so that other players can explore your world and have fun with your game.
Creating a place in Roblox Studio is a fun and creative way to express your ideas and imagination. With a little practice, you can make amazing games and environments that other players will love to explore.
Activity: Create a Place
- Open Roblox Studio on your computer.
- On the Home tab, click the “New” button.
- In the drop-down menu, select “New Place.”
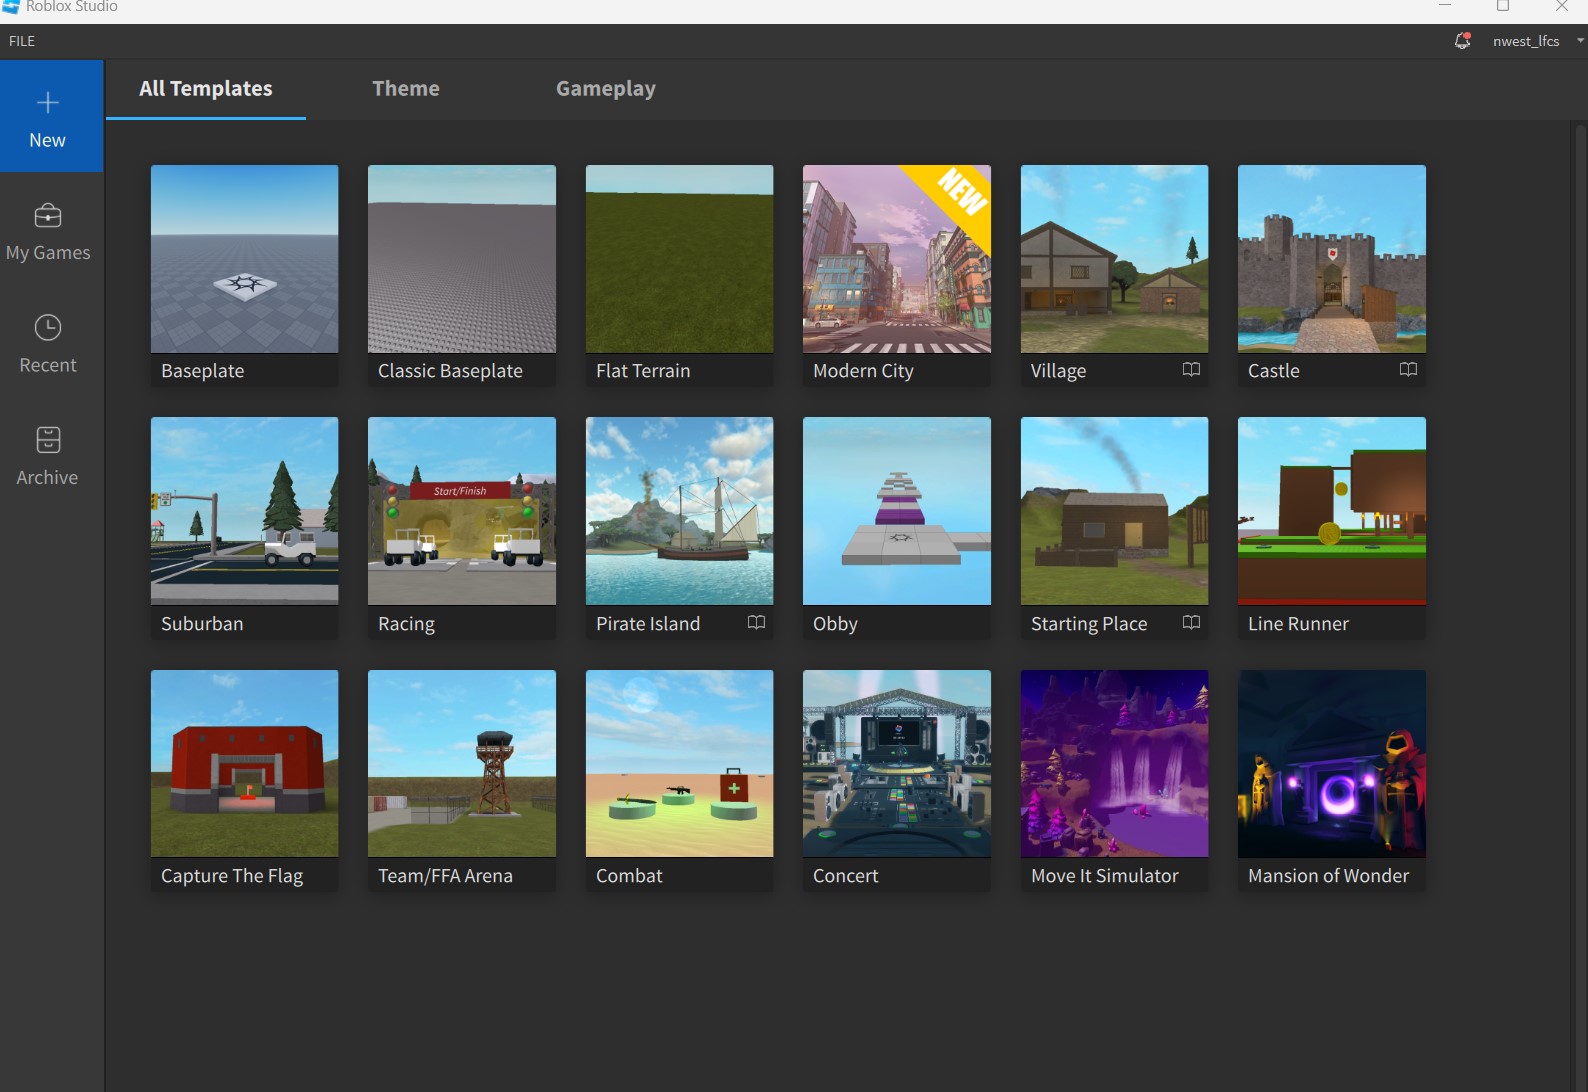
- A dialog box will appear where you can choose a template or start from scratch. If you want to use a template, select it from the list and click “Create.” If you want to start from scratch, click the “Empty Baseplate” option and then click “Create.”
- The new place will be created, and thep program will move your to the Roblox Studio workspace.
- You can now start building your game using the tools available in Roblox Studio. .
Parts
In Roblox Studio, a Part is an object that you can use to build things in your game. Parts are like building blocks that you can put together to create different kinds of objects and structures.
Each Part has a specific shape, size, and color. You can use the Move Tool to position and move Parts around your game world. You can also use the Scale Tool to make Parts bigger or smaller, and the Rotate Tool to change their orientation.
Parts are often used to create things like buildings, vehicles, and other objects. They can also be used to create special effects like explosions or particle effects.
A part can be added to your place using the following steps:
-
Open Roblox Studio on your computer. You can find the icon on your desktop or search for it in your applications folder.
-
Click on “New” to create a new place or open an existing one if you have a project in progress.
-
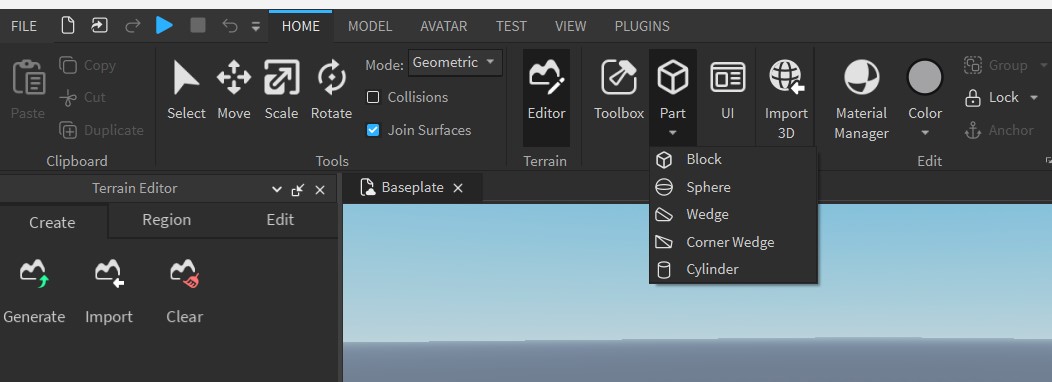
Once your place is open, you will see a variety of icons and menus. Under the “Home” tab at the top of the screen and Look for the “Parts” category and click on it
-
You will see basic shapes like cubes and spheres. Click on the shape you want to add, and it will be added to your game.
- With the part selected, move your mouse to the 3D view window. Click and drag the part to position it where you want it in the game world. You can also use the arrow keys on your keyboard to move the part around.
Activity: Adding Parts
Move Tool
The Move Tool is one of the tools you can use in Roblox Studio to move objects around in your game. When you select an object, such as a part, using the Select Tool, you can then use the Move Tool to move it around in different directions.
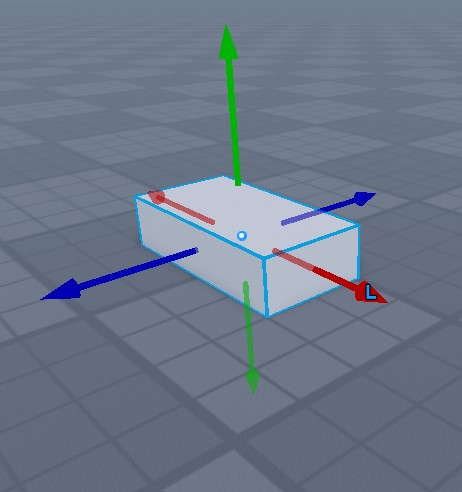
The Move Tool has three arrows that point in different directions: red, green, and blue. Each arrow represents a different axis: the red arrow represents the X-axis, the green arrow represents the Y-axis, and the blue arrow represents the Z-axis. You can use these arrows to move an object in any direction you want.
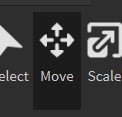
To use the Move Tool, select an object using the Select Tool, then click on the Move Tool button in the toolbar. You can then click and drag one of the arrows to move the object along that axis. For example, if you want to move an object to the left or right, you would click and drag the red arrow. If you want to move it up or down, you would click and drag the green arrow. If you want to move it closer or farther away, you would click and drag the blue arrow.
Activity: Moving Parts
Add a new part to your place in Roblox Studio. Use the move tool to move the part from its original location.
Scale Tool
The Scale Tool is a tool in Roblox Studio that lets you change the size of objects in your game. With the Scale Tool, you can make objects bigger or smaller, change their shape, and stretch them in different directions.
The Scale Tool has three arrows that point in different directions: red, green, and blue. Each arrow represents a different axis: the red arrow represents the X-axis, the green arrow represents the Y-axis, and the blue arrow represents the Z-axis. You can use these arrows to scale an object in any direction you want.
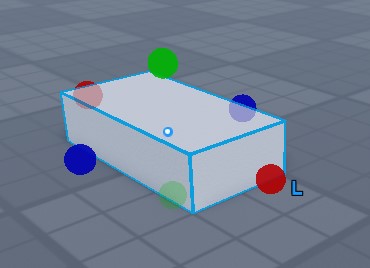
To use the Scale Tool, select an object using the Select Tool, then click on the Scale Tool button in the toolbar. You can then click and drag one of the arrows to scale the object along that axis. For example, if you want to make an object wider or narrower, you would click and drag the red arrow. If you want to make it taller or shorter, you would click and drag the green arrow. If you want to make it thicker or thinner, you would click and drag the blue arrow.
It’s important to note that scaling an object can also affect its properties, such as its weight and collision boundaries. So, be careful when scaling objects, and always test your game to make sure everything works as intended.
Activity: Scaling Parts
Add two new parts to your place in Roblox Studio. Use the scale tool to increase the size of one part and decrease the size of the other part
Rotate Tool
The Rotate Tool is a tool in Roblox Studio that allows you to rotate objects in your game. With the Rotate Tool, you can change the direction an object is facing or rotate it in different ways.
The Rotate Tool has three circles that represent the X-axis, Y-axis, and Z-axis. Each circle represents a different axis of rotation. The red circle represents the X-axis, the green circle represents the Y-axis, and the blue circle represents the Z-axis.
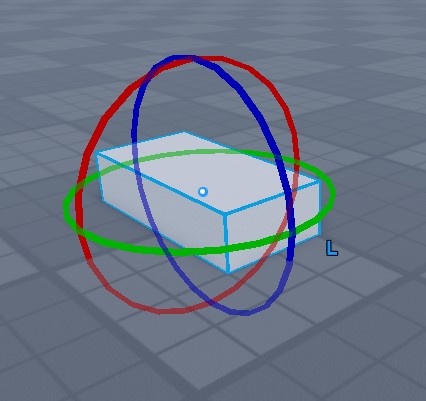
To use the Rotate Tool, select an object using the Select Tool, then click on the Rotate Tool button in the toolbar. You can then click and drag one of the circles to rotate the object along that axis. For example, if you want to rotate an object to the left or right, you would click and drag the red circle. If you want to rotate it up or down, you would click and drag the green circle. If you want to rotate it clockwise or counterclockwise, you would click and drag the blue circle.
Activity: Rotating Parts
Add a new part to your place in Roblox Studio. Use the rotate tool to rotate the part.
It’s important to note that rotating an object can also affect its properties, such as its position and collision boundaries. So, be careful when rotating objects, and always test your game to make sure everything works as intended.
Testing Your Game
Once you’ve created your game in Roblox Studio, you’ll want to test it out to see how it plays. To do this, you’ll need to follow these steps:
- Click on the “Play” button in the top menu of Roblox Studio. This will open up a new window that shows you what your game will look like when you play it.
- Use the arrow keys on your keyboard to move your character around in the game world. You can also use your mouse to look around and click on things in the game.
- Try out all of the features of your game, such as jumping, collecting items, or completing objectives. Make sure everything works the way you intended it to.
- If you find any issues or bugs in your game, you can go back to Roblox Studio and make changes to fix them.
- Keep testing your game until you’re happy with how it plays.
- When you’re ready to share your game with others, you can publish it to the Roblox platform so that other players can play it too.
Testing your game is an important part of the game development process, as it allows you to see how everything works together and make any necessary changes before you share it with others.
Game Controls
When you’re playing a game in Roblox Studio, there are certain controls you’ll need to know in order to move around and interact with the game world. Here are the basic controls:
- Use the arrow keys on your keyboard to move your character around in the game world. The up arrow key moves your character forward, the down arrow key moves your character backward, and the left and right arrow keys move your character left and right.
- To jump, press the spacebar on your keyboard. This will make your character jump up in the air.
- If your game has special actions, such as picking up items or using special abilities, you can use the mouse or other keys on your keyboard to perform these actions. Make sure to check the instructions for your game to see what special controls are available.
- To look around in the game world, move your mouse to the left or right. This will make your character turn in that direction.
- You can also use the mouse to click on objects in the game world, such as buttons or items. This will allow you to interact with them and perform various actions.
Putting it All Together
- Launch Roblox Studio on your computer.
- Start a new place by clicking on “New” in Roblox Studio.
- Choose a baseplate template to serve as the foundation for your game world.
- Add at least three different parts to your game world using the steps explained in the previous instructions. These can be cubes, spheres, or any other shape you prefer.
- Use the move tool to position the parts in different locations within your game world. Experiment with moving the parts up, down, left, right, and anywhere else you want.
- Use the rotate tool to rotate one or more parts in your game world. Try rotating them in different directions, such as clockwise or counterclockwise.
- Use the scale tool to resize one or more parts in your game world. Make some parts larger and others smaller to add variety and creativity to your game world.
- Once you’re satisfied with the placement, rotation, and scaling of your parts, click on the “Play” button located at the top of the screen to test your game.
- Move your character around using the arrow keys or WASD keys on your keyboard to explore your game world.
- Observe how your parts interact with the player character and other objects in your game world. Check if they are positioned correctly, scaled properly, and if any rotation adds to the gameplay experience.
- If you encounter any issues or want to make adjustments, exit the play mode by clicking on the “Stop” button located at the top of the screen. Go back to the workspace and make the necessary changes using the move, rotate, or scale tools.
- Repeat steps 8 to 11 until you are satisfied with the gameplay and aesthetics of your game world.
- Once you have completed the exercise, save your progress by clicking on “File” and selecting “Save” or using the keyboard shortcut Ctrl + S.
Vocabulary Review
| Terms | Definitions |
|---|---|
| roblox studio | a software program that allows you to create your own video games and virtual worlds |
| place | a virtual environment that you create for your game |
| part | an object that you can use to build things in your game |
| texture | like a skin that you can apply to the surface of a Part in your game world |
| decals | a special image that you can apply to the surface of a Part in your game world |
| move tool | one of the tools you can use in Roblox Studio to move objects around in your game |
| scale tool | a tool in Roblox Studio that lets you change the size of objects in your game |
| rotate tool | a tool in Roblox Studio that allows you to rotate objects in your game |